This Marshmallow Cheesecake is the ultimate no-bake dessert that brings a delightful combination of flavors and textures. With its creamy marshmallow filling and fluffy topping, this cheesecake will impress at any gathering or celebration. Whether it’s a birthday party, holiday feast, or just a sweet treat for yourself, this cake stands out with its easy preparation and delicious taste.
Jump to:
- Why You’ll Love This Recipe
- Tools and Preparation
- Essential Tools and Equipment
- Importance of Each Tool
- Ingredients
- For the Crust
- For the Filling
- For the Topping
- How to Make Marshmallow Cheesecake
- Step 1: Prepare the Crust
- Step 2: Make the Filling
- Step 3: Assemble the Cheesecake
- Step 4: Prepare the Topping
- Step 5: Final Touches
- How to Serve Marshmallow Cheesecake
- Classic Presentation
- Individual Mini Cheesecakes
- Festive Garnishes
- Ice Cream Pairing
- Coffee or Tea Pairings
- How to Perfect Marshmallow Cheesecake
- Best Side Dishes for Marshmallow Cheesecake
- Common Mistakes to Avoid
- Storage & Reheating Instructions
- Refrigerator Storage
- Freezing Marshmallow Cheesecake
- Reheating Marshmallow Cheesecake
- Frequently Asked Questions
- How do I make my Marshmallow Cheesecake fluffier?
- Can I use flavored marshmallow fluff?
- How long will my Marshmallow Cheesecake last?
- Is this recipe suitable for special diets?
- Final Thoughts
- 📖 Recipe Card
Why You’ll Love This Recipe
- No-Bake Delight: Skip the oven and enjoy a hassle-free dessert that’s perfect for hot days.
- Fluffy Texture: The airy marshmallow fluff gives this cheesecake an incredibly light and creamy consistency.
- Versatile Flavor: This cheesecake can be customized easily with different toppings or mix-ins to suit your taste.
- Easy Preparation: With simple steps and minimal hands-on time, you can whip this up in just 25 minutes.
- Crowd-Pleaser: Its sweet flavor and visually appealing presentation make it a favorite among guests of all ages.
Tools and Preparation
Having the right tools makes preparing your Marshmallow Cheesecake even easier. Gather these essential items to ensure a smooth baking experience.
Essential Tools and Equipment
- Springform pan
- Mixing bowls
- Electric mixer
- Rubber spatula
- Measuring cups
Importance of Each Tool
- Springform pan: This allows for easy removal of the cheesecake without damaging its structure.
- Electric mixer: Whipping cream cheese and heavy cream becomes effortless, resulting in a smooth texture.
- Rubber spatula: Perfect for folding ingredients together gently without deflating the whipped cream.
Ingredients
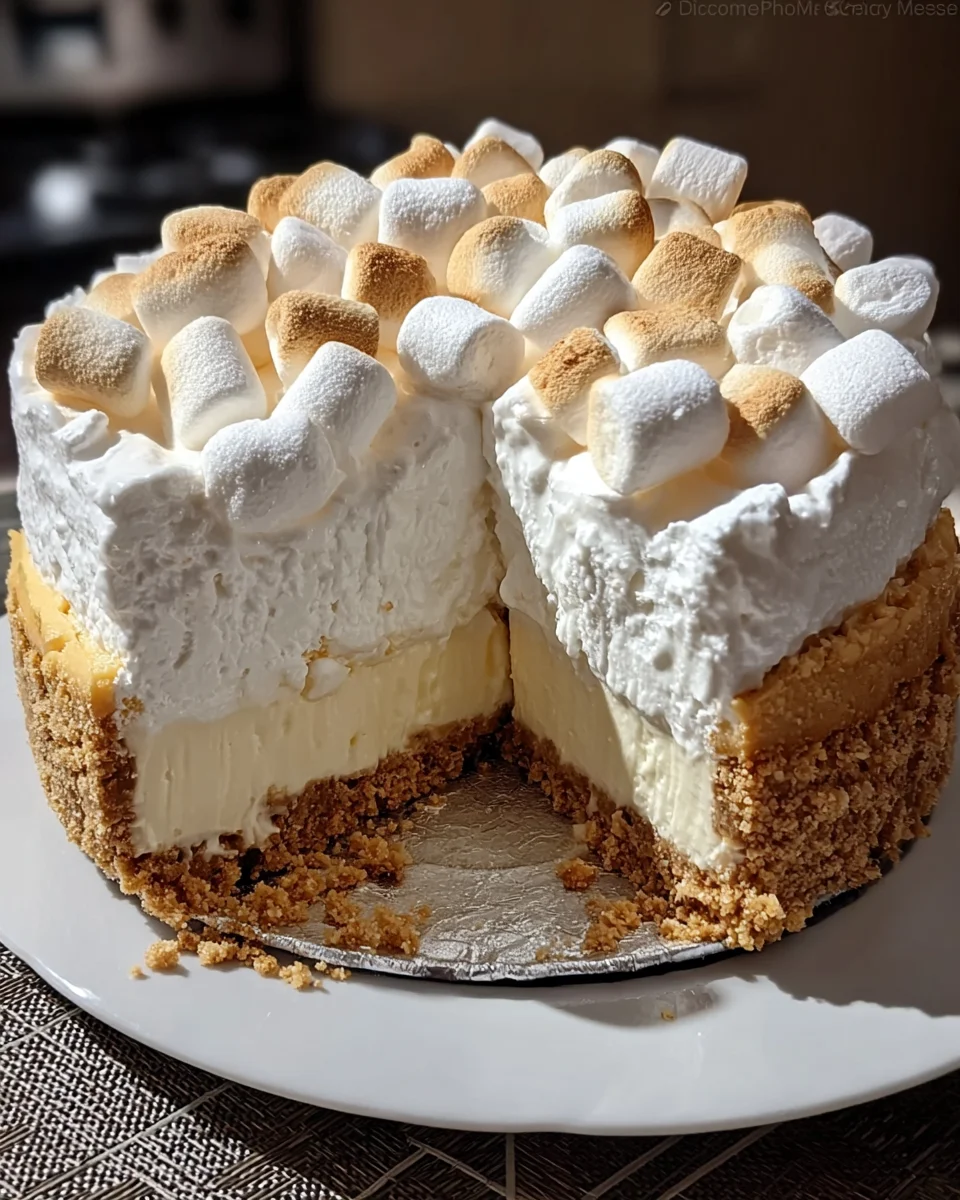
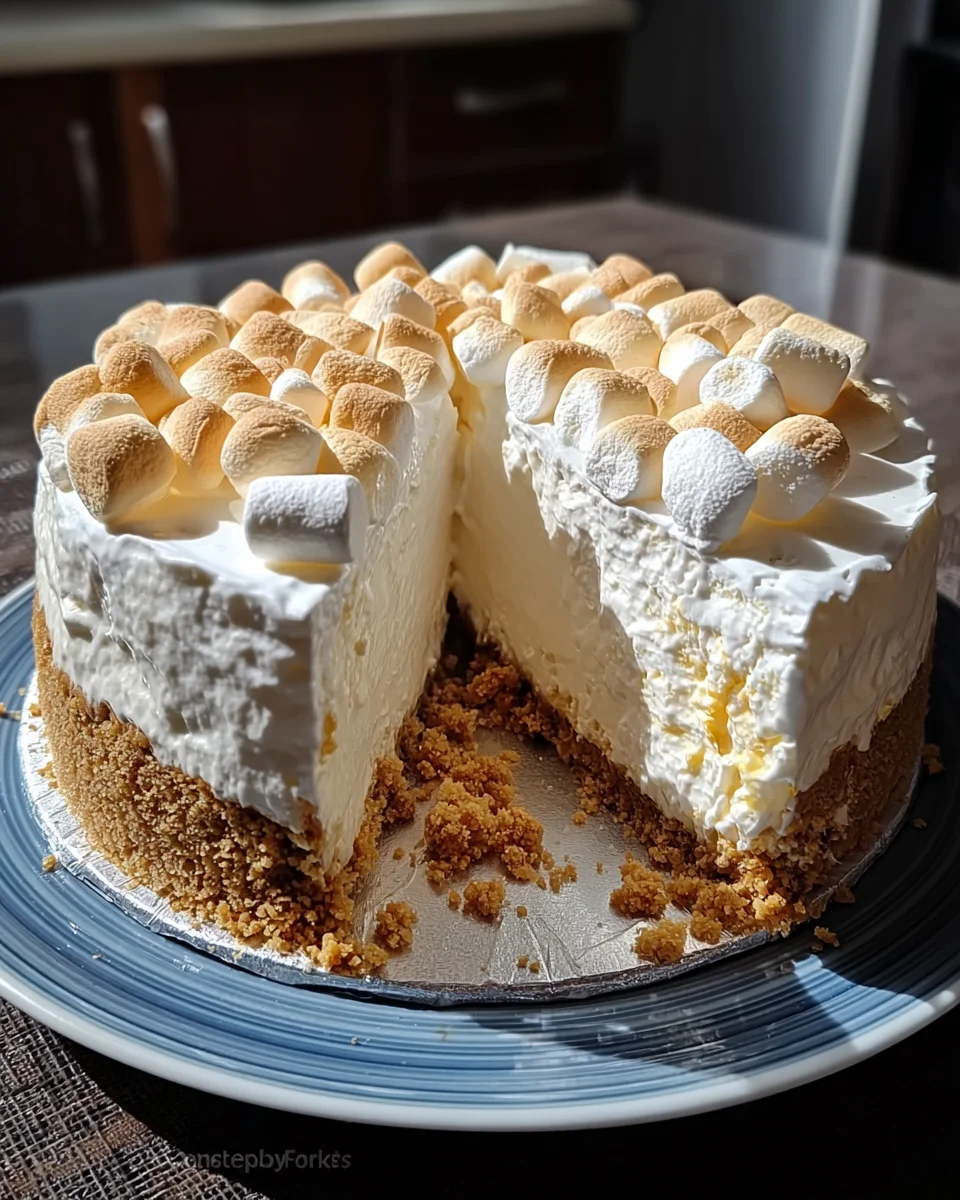
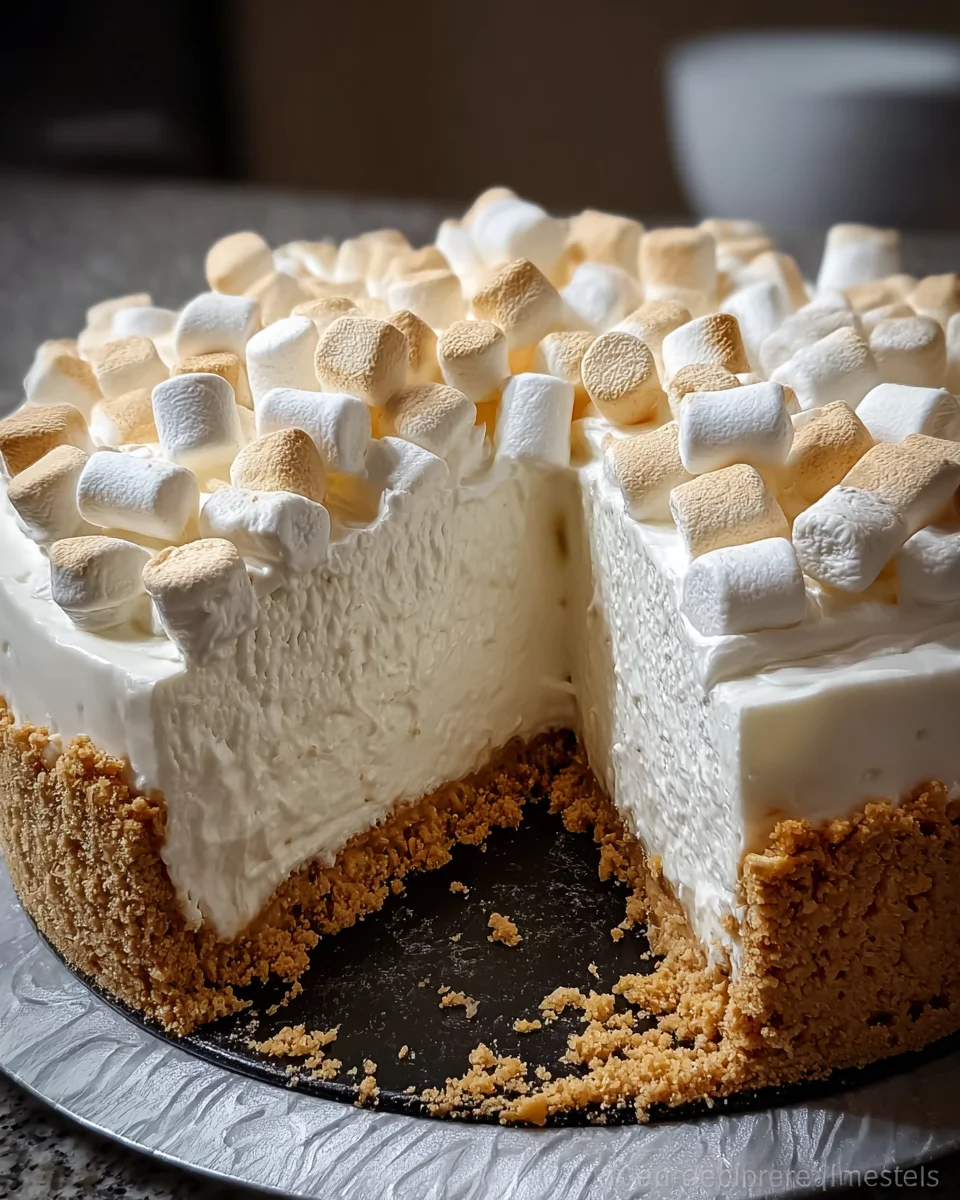
This dreamy, fluffy, no-bake Marshmallow Whip Cheesecake features a graham cracker crust, creamy marshmallow filling, and a fluffy marshmallow topping.
For the Crust
- 1 ½ cups graham cracker crumbs
- ¼ cup granulated sugar (for crust)
- ½ cup unsalted butter, melted
For the Filling
- 16 oz cream cheese, softened
- 1 cup powdered sugar
- 1 tsp vanilla extract
- 1 ½ cups marshmallow fluff
- 1 cup heavy cream, whipped
For the Topping
- 1 cup marshmallow fluff (for topping)
- 1 cup heavy cream, whipped (for topping)
- Mini marshmallows or crushed graham crackers (optional, for garnish)
How to Make Marshmallow Cheesecake
Step 1: Prepare the Crust
- In a bowl, mix together graham cracker crumbs, granulated sugar, and melted butter until well combined.
- Press this mixture firmly into the bottom of a 9-inch springform pan.
- Chill in the refrigerator while you prepare the filling.
Step 2: Make the Filling
- In a mixing bowl, beat softened cream cheese with powdered sugar until creamy and smooth.
- Add vanilla extract and marshmallow fluff to the mixture; combine well.
- Fold in the whipped heavy cream gently until fully incorporated.
Step 3: Assemble the Cheesecake
- Pour the creamy filling over the chilled crust in your springform pan.
- Spread evenly with a spatula and refrigerate for at least 4 hours or until set.
Step 4: Prepare the Topping
- In another bowl, combine additional marshmallow fluff with whipped heavy cream.
- Gently spread this mixture over the set cheesecake once it’s firm.
Step 5: Final Touches
- Garnish with mini marshmallows or crushed graham crackers if desired.
- Chill for another 1-2 hours before serving for best results.
Enjoy your homemade Marshmallow Cheesecake as an indulgent treat that everyone will love!
How to Serve Marshmallow Cheesecake
Serving Marshmallow Cheesecake is all about enhancing its delightful flavor and texture. With a few simple ideas, you can make this dessert even more enjoyable for your guests.
Classic Presentation
- Use a sharp knife to slice neat portions for an elegant presentation.
- Serve on a decorative platter to add a touch of style.
Individual Mini Cheesecakes
- Pour the mixture into small cups or jars for individual servings.
- Top each with mini marshmallows for a cute and fun look.
Festive Garnishes
- Add fresh fruits such as strawberries or raspberries for a refreshing contrast.
- Drizzle chocolate sauce over the top for an indulgent treat.
Ice Cream Pairing
- Serve slices alongside vanilla or chocolate ice cream to elevate the dessert experience.
- Consider adding a scoop of ice cream on top for extra creaminess.
Coffee or Tea Pairings
- Offer cups of coffee or flavored tea alongside the cheesecake.
- The warmth of these beverages complements the cool, creamy dessert beautifully.
How to Perfect Marshmallow Cheesecake
To achieve the perfect Marshmallow Cheesecake, follow these helpful tips that will ensure your dessert turns out delicious every time.
- Use room temperature ingredients: Let your cream cheese and heavy cream warm up before mixing. This helps achieve a smoother filling.
- Fold gently: When incorporating whipped cream into the mixture, fold gently to maintain its airy texture. This keeps your cheesecake light and fluffy.
- Chill adequately: Allow the cheesecake to set in the refrigerator for at least 4 hours, but overnight is best for optimal firmness.
- Experiment with flavors: Add different extracts like almond or coconut for unique twists on traditional flavors. This can elevate your cheesecake to another level.
- Check crust firmness: Ensure that your crust is tightly pressed into the pan before adding the filling. A firm crust holds up better when served.
Best Side Dishes for Marshmallow Cheesecake
Pairing side dishes with your Marshmallow Cheesecake can create a well-rounded dessert spread. Here are some delicious options that complement its sweetness beautifully.
- Fresh Fruit Salad: A medley of seasonal fruits adds freshness and balance to the rich cheesecake.
- Chocolate-Dipped Strawberries: These treats offer a sweet yet slightly tart contrast to the creamy cheesecake.
- Whipped Cream: A dollop of whipped cream enhances decadence and adds lightness alongside each slice.
- Graham Cracker Crumbs: Sprinkle some crumbs over each serving as a nod to the crust, providing texture and visual appeal.
- Ice Cream Sundaes: Create sundaes with scoops of ice cream topped with hot fudge or caramel sauce to complement your cheesecake’s flavors.
- Nutty Biscotti: Provide crunchy biscotti on the side; their crunch pairs well with the soft texture of cheesecake while adding flavor depth.
Common Mistakes to Avoid
Making a Marshmallow Cheesecake is simple, but avoiding common pitfalls can make your dessert truly shine. Here are some mistakes to watch for:
- crust preparation: Not pressing the graham cracker crust firmly can lead to a crumbly base. Ensure you pack it tightly into the pan for stability.
- cream cheese temperature: Using cold cream cheese can cause lumps in your cheesecake. Always soften it to room temperature for a smooth filling.
- folding technique: Over-mixing the whipped cream into the filling can deflate it. Gently fold until combined to keep that fluffy texture.
- chilling time: Rushing the refrigeration process can result in a cheesecake that doesn’t set properly. Allow it at least 4 hours to firm up.
- topping application: Spreading the topping too soon may disturb the filling. Wait until the cheesecake is fully set before adding toppings.
Storage & Reheating Instructions
Refrigerator Storage
- Store leftover Marshmallow Cheesecake in an airtight container for up to 5 days.
- Keep it in the back of the fridge where it’s coldest to maintain freshness.
Freezing Marshmallow Cheesecake
- Wrap individual slices or the whole cheesecake tightly in plastic wrap and then aluminum foil.
- It can be frozen for up to 2 months; just thaw overnight in the refrigerator before serving.
Reheating Marshmallow Cheesecake
- Oven: Preheat to 350°F (175°C) and warm slices wrapped in foil for about 10-15 minutes.
- Microwave: Heat each slice on low power for about 20-30 seconds, checking frequently.
- Stovetop: Use a double boiler method, placing slices on a plate above simmering water for gentle warming.
Frequently Asked Questions
Here are some common questions about making and enjoying Marshmallow Cheesecake.
How do I make my Marshmallow Cheesecake fluffier?
To achieve a fluffier texture, ensure that your whipped cream is well-whipped before folding it into the filling.
Can I use flavored marshmallow fluff?
Absolutely! Using flavored marshmallow fluff like chocolate or strawberry adds a unique twist to your Marshmallow Cheesecake.
How long will my Marshmallow Cheesecake last?
If stored properly in the refrigerator, your cheesecake will last up to 5 days. For longer storage, freezing is recommended.
Is this recipe suitable for special diets?
This recipe contains dairy and gluten. However, you can make adjustments using gluten-free graham crackers and dairy alternatives.
Final Thoughts
This delightful Marshmallow Cheesecake is perfect for any occasion, offering a creamy delight that’s easy to make and customize. You can add fruit toppings or experiment with different flavors of marshmallow fluff. Try this recipe today and enjoy its heavenly taste!
Did You Enjoy Making This Recipe? Please rate this recipe with ⭐⭐⭐⭐⭐ or leave a comment.
📖 Recipe Card
Print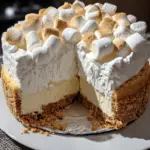
Marshmallow Cheesecake
- Total Time: 0 hours
- Yield: Serves approximately 8 slices 1x
Description
Indulge in the ultimate no-bake Marshmallow Cheesecake, a delightful dessert that combines a creamy marshmallow filling with a crunchy graham cracker crust. Perfect for any occasion, this cheesecake is not only easy to prepare but also a crowd-pleaser, boasting an airy texture and sweet flavor that will impress your guests. With minimal ingredients and simple steps, you can whip up this heavenly treat in just 25 minutes. Customize it with your favorite toppings or enjoy it as is—either way, it’s sure to satisfy your sweet cravings!
Ingredients
- 1 ½ cups graham cracker crumbs
- ¼ cup granulated sugar (for crust)
- ½ cup unsalted butter, melted
- 16 oz cream cheese, softened
- 1 cup powdered sugar
- 1 tsp vanilla extract
- 1 ½ cups marshmallow fluff
- 1 cup heavy cream, whipped (for filling)
- Additional marshmallow fluff and heavy cream for topping
Instructions
- Prepare the crust: Combine graham cracker crumbs, granulated sugar, and melted butter. Press into a springform pan and chill.
- Make the filling: Beat cream cheese and powdered sugar until smooth. Add vanilla and marshmallow fluff; mix well. Gently fold in whipped cream.
- Assemble: Pour filling over the chilled crust. Smooth out and refrigerate for at least 4 hours.
- Prepare the topping: Mix additional marshmallow fluff with whipped cream and spread over the set cheesecake.
- Garnish if desired and chill before serving.
- Prep Time: 25 minutes
- Cook Time: None
- Category: Dessert
- Method: No-Bake
- Cuisine: American
Nutrition
- Serving Size: 1 slice
- Calories: 320
- Sugar: 24g
- Sodium: 180mg
- Fat: 22g
- Saturated Fat: 12g
- Unsaturated Fat: 9g
- Trans Fat: 0g
- Carbohydrates: 30g
- Fiber: 1g
- Protein: 4g
- Cholesterol: 60mg
