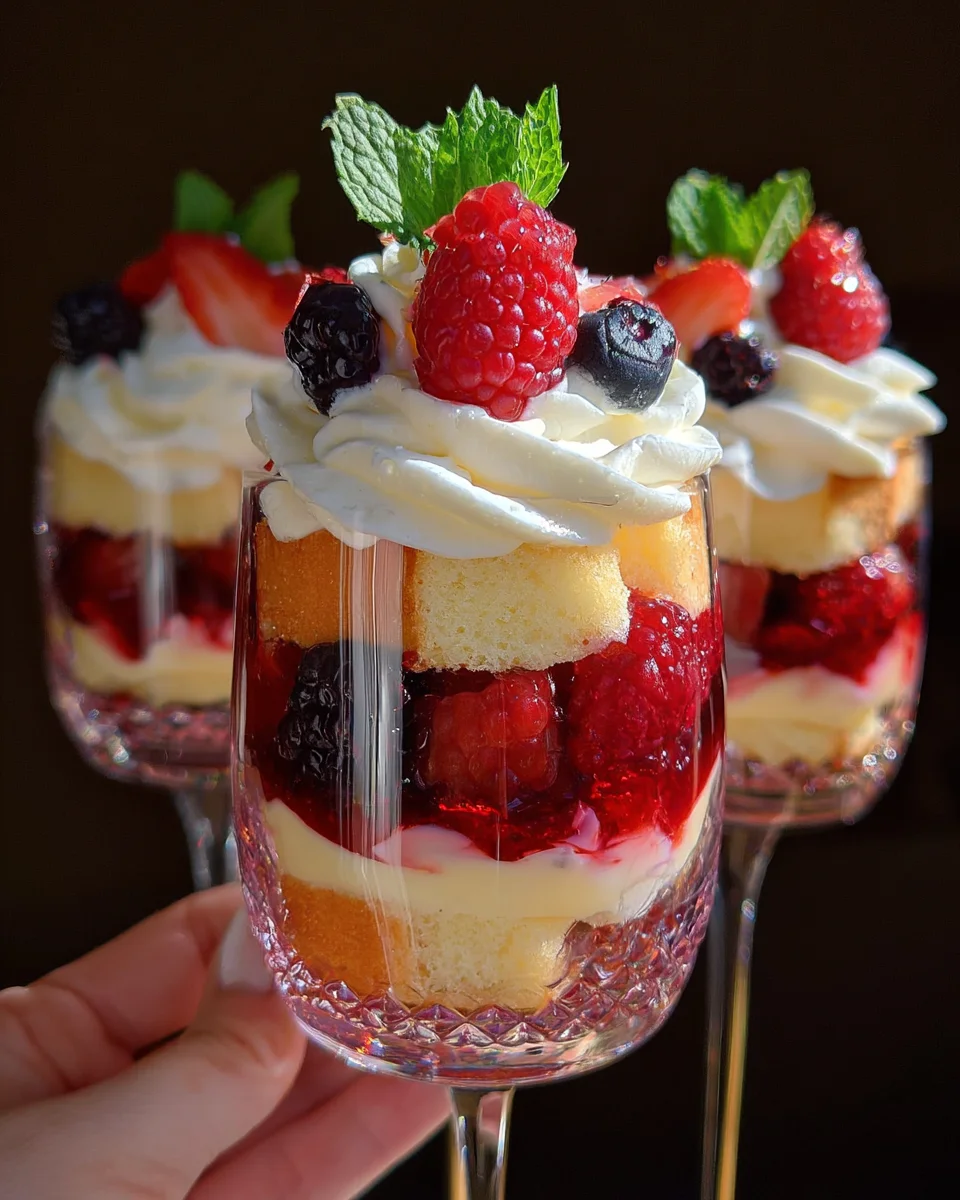
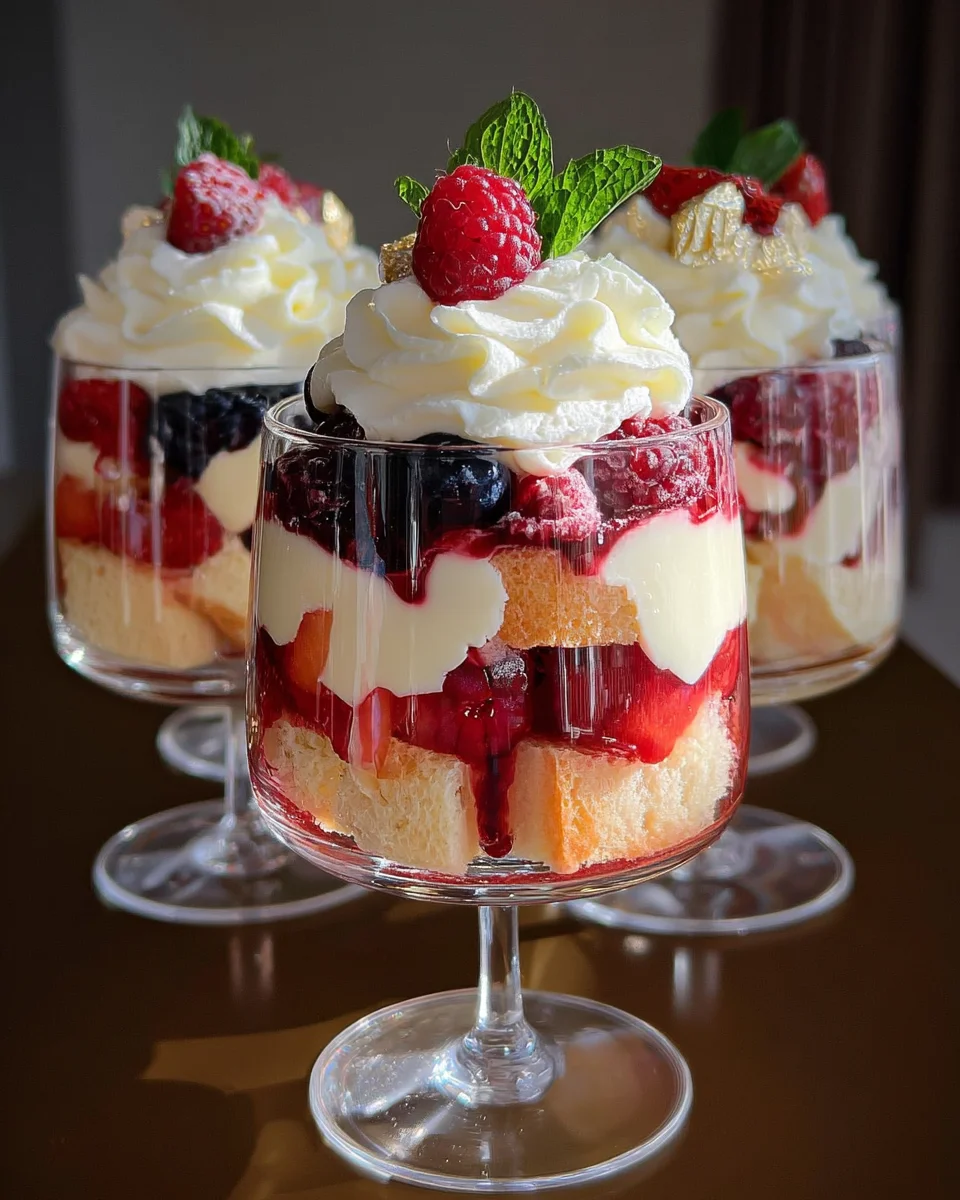
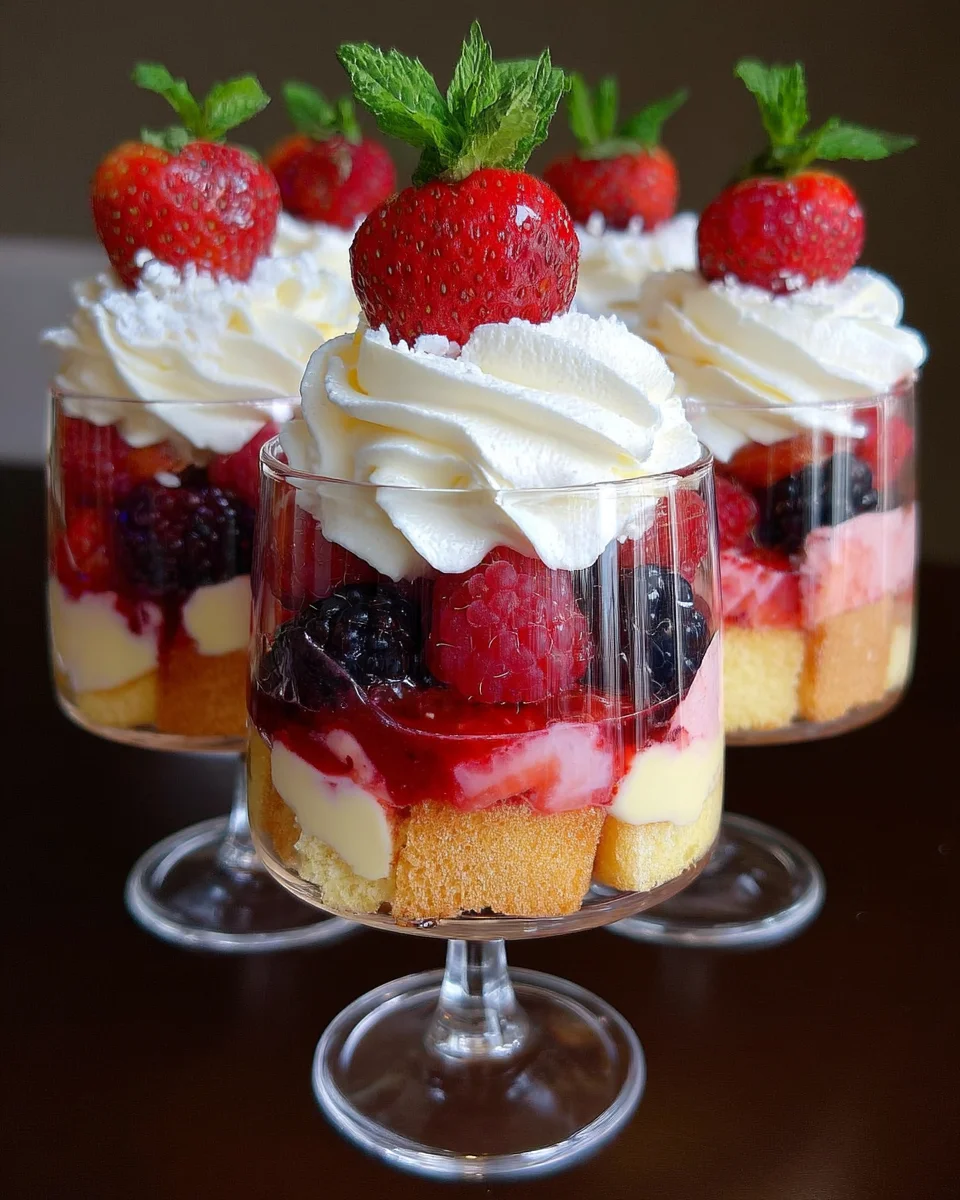
These delightful Mini Trifles are the perfect dessert to impress your guests at any gathering. With their vibrant layers of jelly, cream, sponge, and fresh berries, they not only look stunning but also taste divine. Whether for a festive occasion or a simple family dinner, these trifles are versatile enough to suit any event. Plus, they can be made a day ahead, allowing you to enjoy the celebration without the stress of last-minute preparations.
Jump to:
- Why You’ll Love This Recipe
- Tools and Preparation
- Essential Tools and Equipment
- Importance of Each Tool
- Ingredients
- For the Jelly Layer
- For the Cream Layer
- For the Sponge Layer
- For Flavors
- For Custard Layer
- For Toppings
- How to Make Mini Trifles
- Step 1: Prepare the Jelly
- Step 2: Fill Dessert Dishes
- Step 3: Chill Jelly Layers
- Step 4: Mix Cream with Jelly
- Step 5: Add Flummery Layer
- Step 6: Allow to Set Again
- Step 7: Prepare Sponge Fingers
- Step 8: Create Sponge Layer
- Step 9: Add Berry Layer
- Step 10: Whip Cream
- Step 11: Decorate
- How to Serve Mini Trifles
- For a Festive Occasion
- Pairing with Coffee
- Outdoor Events
- Kids’ Parties
- How to Perfect Mini Trifles
- Best Side Dishes for Mini Trifles
- Common Mistakes to Avoid
- Storage & Reheating Instructions
- Refrigerator Storage
- Freezing Mini Trifles
- Reheating Mini Trifles
- Frequently Asked Questions
- What are Mini Trifles?
- How do I customize my Mini Trifles?
- Can I make Mini Trifles ahead of time?
- Are Mini Trifles suitable for kids?
- Final Thoughts
- 📖 Recipe Card
Why You’ll Love This Recipe
- Stunning Presentation: The beautiful layers make these mini trifles an eye-catching dessert that will wow your guests.
- Easy Preparation: With straightforward steps, this recipe is simple enough for even novice cooks to master.
- Versatile Ingredients: You can easily customize the flavors and ingredients based on your preferences or dietary needs.
- Make Ahead Option: Prepare these trifles a day in advance for a hassle-free dessert that still tastes fresh and delicious.
- Decadent Flavor: The combination of creamy custard, sweet berries, and rich sponge creates a delightful explosion of flavors in every bite.
Tools and Preparation
To create the best mini trifles, having the right tools makes all the difference. Here’s what you’ll need:
Essential Tools and Equipment
- Small dessert dishes or wine glasses
- Mixing bowls
- Electric mixer or whisk
- Measuring cups and spoons
- Tray for crushing sponge fingers
Importance of Each Tool
- Small dessert dishes or wine glasses: Perfect for layering and showcasing the beautiful colors of your mini trifles.
- Electric mixer or whisk: Ensures your cream reaches stiff peaks quickly for that perfect texture.
- Measuring cups and spoons: Guarantees accurate ingredient measurements, which is key for consistent results.
Ingredients
These lovely layered mini trifles will wow your guests and can be made up a day ahead.
For the Jelly Layer
- 85 grams jelly crystals (1 packet Aeroplane jelly if you’re in Australia)
For the Cream Layer
- 125 mls cream (tinned cream, thickened cream or heavy cream)
For the Sponge Layer
- 12 pieces Tiramisu sponge fingers (about 1 cup fresh sponge chopped in small squares)
For Flavors
- 1/2 cup port, sherry or muscat (or juice for a non-alcoholic version)
For Custard Layer
- 1 1/2 cups custard (bought or home-made)
For Toppings
- 400 grams berries (I used strawberries, raspberries and blackberries)
- 200 mls thickened cream (known as heavy cream in US)
- 1 teaspoon custard powder
- Mint leaves for decorating
How to Make Mini Trifles
Step 1: Prepare the Jelly
Make up jelly following the instructions. This should make about 2 cups of jelly.
Step 2: Fill Dessert Dishes
Use 1 1/4 cups of the liquid jelly mixture to fill the bottoms of 6 small dessert dishes or wine glasses.
Step 3: Chill Jelly Layers
Put the 6 glasses and remaining mixture into the fridge.
Step 4: Mix Cream with Jelly
When the remaining mixture is close to setting (but still able to be poured), combine it with cream and beat on high for about 4 minutes.
Step 5: Add Flummery Layer
The jelly in the cups should almost be set by this stage. Carefully pour the jelly and cream mixture (flummery) to add another layer to each of the glasses.
Step 6: Allow to Set Again
Allow this layer to set in the fridge until firm.
Step 7: Prepare Sponge Fingers
Crush sponge fingers in a tray and then pour over port, sherry or muscat. Substitute juice if you’d prefer a kids’ or non-alcoholic version of the trifle.
Step 8: Create Sponge Layer
Add sponge fingers as the next layer followed by pouring custard in each glass.
Step 9: Add Berry Layer
Add chopped berries as another layer while reserving 6 berries for decorating later.
Step 10: Whip Cream
Whip thickened cream with custard powder until it forms stiff peaks.
Step 11: Decorate
Pipe whipped cream onto top of layers and decorate each trifle with a reserved berry and mint leaf.
Now you’re ready to serve these delectable mini trifles! Enjoy each layer’s burst of flavor with every spoonful.
How to Serve Mini Trifles
Mini trifles make a delightful addition to any gathering. Their elegant presentation and delicious layers will impress your guests at parties, family dinners, or special occasions.
For a Festive Occasion
- Holiday Gatherings: Serve mini trifles as a festive dessert to complement your holiday meal. The colorful layers are sure to brighten the table.
- Birthday Celebrations: Personalize each trifle with candles for birthdays. Guests will appreciate the individual servings.
Pairing with Coffee
- Coffee Time: These mini trifles pair wonderfully with coffee. The sweetness of the dessert balances perfectly with a rich cup of brew.
- Afternoon Tea: Add them to your afternoon tea spread. They provide a touch of luxury alongside scones and sandwiches.
Outdoor Events
- Picnics: Pack mini trifles in portable containers for picnics. They are easy to transport and require no utensils.
- Barbecues: Serve these delightful desserts at barbecues for a refreshing end to grilled meals.
Kids’ Parties
- Fun Flavors: Customize mini trifles with fun flavors like chocolate or fruit combinations that kids love.
- Interactive Dessert Station: Set up a station where kids can build their own mini trifles with various toppings.
How to Perfect Mini Trifles
Creating the perfect mini trifles requires attention to detail. Here are some helpful tips to ensure your trifles turn out beautifully.
- bold layer carefully: When adding each layer, do so gently to maintain distinct layers that look appealing.
- bold chill thoroughly: Ensure each layer has set properly in the fridge before adding the next layer for better structure.
- bold use fresh ingredients: Opt for fresh berries and cream for the best flavor and texture in your trifles.
- bold garnish attractively: Top each trifle with mint leaves and whole berries for an eye-catching presentation.
Best Side Dishes for Mini Trifles
While mini trifles are a standout dessert on their own, complementing them with side dishes can enhance the overall experience. Here are some excellent options:
- bold Cheese Platter: A selection of cheeses pairs well with sweet desserts, providing a savory contrast.
- bold Fresh Fruit Salad: Lighten up the meal with a refreshing fruit salad that complements the richness of the trifle.
- bold Savory Pastries: Offer small savory pastries as an appetizer before indulging in the sweet treat.
- bold Chocolate Fondue: Set up a chocolate fondue station where guests can dip fruits or marshmallows after enjoying their mini trifles.
- bold Mixed Nuts: Provide bowls of mixed nuts for guests who enjoy a crunchy snack alongside their dessert.
- bold Vanilla Ice Cream: A scoop of vanilla ice cream can be served alongside for those wanting an extra creamy indulgence.
Common Mistakes to Avoid
When making mini trifles, it’s easy to overlook some key details that can affect the final result. Here are some common mistakes and how to avoid them.
- Not allowing layers to set properly – Each layer needs time to set before adding the next one. This ensures that the trifles hold their shape and look appealing.
- Using too much liquid in the jelly – Follow the instructions carefully for the jelly mixture. Too much liquid can lead to a runny trifle.
- Skipping the chilling time – These mini trifles taste best when chilled. Don’t rush this step as it enhances flavor and texture.
- Overwhipping the cream – When whipping cream, stop as soon as stiff peaks form. Overwhipped cream can become grainy and separate.
- Not customizing flavors – Feel free to experiment with different fruits or flavors. This recipe is versatile, so don’t hesitate to make it your own.
Storage & Reheating Instructions
Refrigerator Storage
- Store mini trifles in airtight containers.
- They will last up to 3 days in the refrigerator.
- Keep layers separate if possible to maintain texture.
Freezing Mini Trifles
- Mini trifles can be frozen for up to 1 month.
- Use freezer-safe containers or wrap tightly with plastic wrap.
- Thaw in the refrigerator overnight before serving.
Reheating Mini Trifles
- Oven – Not recommended; trifles are best served cold.
- Microwave – Avoid reheating; enjoy them chilled instead.
- Stovetop – Not applicable; these desserts should remain cold.
Frequently Asked Questions
What are Mini Trifles?
Mini trifles are layered desserts typically made with jelly, cream, fruit, and sponge cake or fingers. They are perfect for individual servings.
How do I customize my Mini Trifles?
You can customize your mini trifles by using different fruits, flavored creams, or even adding chocolate layers. The possibilities are endless!
Can I make Mini Trifles ahead of time?
Absolutely! In fact, these mini trifles can be prepared a day in advance, making them ideal for parties or gatherings.
Are Mini Trifles suitable for kids?
Yes! You can easily create a non-alcoholic version by substituting juice for alcohol in the recipe.
Final Thoughts
Mini trifles are a delightful treat that brings joy and elegance to any occasion. Their layered presentation is visually stunning, while their flavor combinations allow for endless customization. Whether you stick with traditional ingredients or try something new, these mini desserts are sure to impress your guests. Give them a try!
Did You Enjoy Making This Recipe? Please rate this recipe with ⭐⭐⭐⭐⭐ or leave a comment.
📖 Recipe Card
Print
Mini Trifles
- Total Time: 50 minutes
- Yield: Serves 6
Description
Mini Trifles are an exquisite dessert that promises to dazzle your guests at any occasion. These charming individual servings feature vibrant layers of jelly, luscious cream, fluffy sponge, and fresh berries, creating a delightful feast for the eyes and taste buds. Perfect for festive events or casual family dinners, these trifles can be prepared a day in advance, allowing you to savor the celebration without the stress of last-minute cooking. With their customizable flavors and easy preparation steps, Mini Trifles are not only a treat for guests but also a fun project for cooks of all skill levels. Get ready to impress with this stunning dessert!
Ingredients
- 85 grams jelly crystals
- 125 mls cream
- 12 pieces Tiramisu sponge fingers
- 1/2 cup port, sherry, or juice
- 1 1/2 cups custard
- 400 grams mixed berries (strawberries, raspberries, blackberries)
- Mint leaves for garnish
Instructions
- Prepare jelly according to package instructions; let it set in small dessert dishes.
- Once set, mix remaining jelly with cream until combined and pour over jelly layers.
- Allow the mixture to set again in the fridge.
- Crush sponge fingers and soak them in port or juice; layer them on top of the cream.
- Add custard on top of the sponge layer followed by fresh berries.
- Whip remaining cream with custard powder until stiff peaks form and pipe onto trifles.
- Garnish with reserved berries and mint leaves before serving.
- Prep Time: 30 minutes
- Cook Time: 20 minutes
- Category: Dessert
- Method: Chilling
- Cuisine: International
Nutrition
- Serving Size: 1 mini trifle (150g)
- Calories: 290
- Sugar: 25g
- Sodium: 50mg
- Fat: 18g
- Saturated Fat: 10g
- Unsaturated Fat: 8g
- Trans Fat: 0g
- Carbohydrates: 30g
- Fiber: 2g
- Protein: 4g
- Cholesterol: 45mg
